Behind the image of The Furnace of Resurrection
Back in around June 2012 I was asked to direct and shoot a short brand film for Tullamore Dew called "The Furnace of Resurrection". The brief from the agency was to create a documentary film following following on from the concept of their "virtual furnace" where Facebook users could "burn all that is dishonesty and fake in the world".
The idea was that all the Facebook submissions were to be burnt in a real furnace to produce charcoal that would then be used to create something "True".
Sitting with the team behind the idea it was quickly established that they wanted something that felt timeless and authentic rather than feeling punchy and looking like reality TV.
I went away a did some thinking and wrote a treatment for the film. Eventually after a few revisions and budget discussions we had client sign-off and the green light.
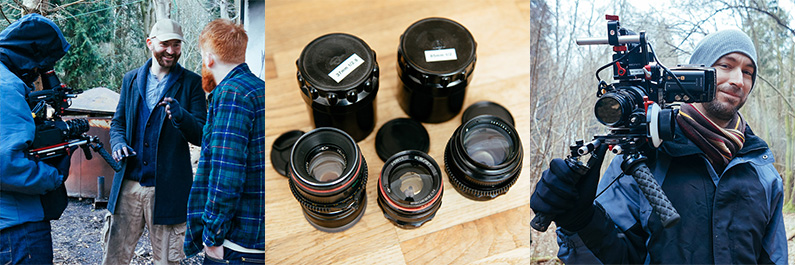
One of the key elements in creating the look was the lenses I chose to use. I have a set of vintage Russian stills lenses designed for the M42 mount Zenith cameras. The nice thing about these lenses is that they are not perfect. They have imperfections that are exactly what we were after. Rather than producing images that are super sharp these lenses produce a dreamy "classic" feel, they flare easily and the way they render colour was perfect for the look were were aiming for.
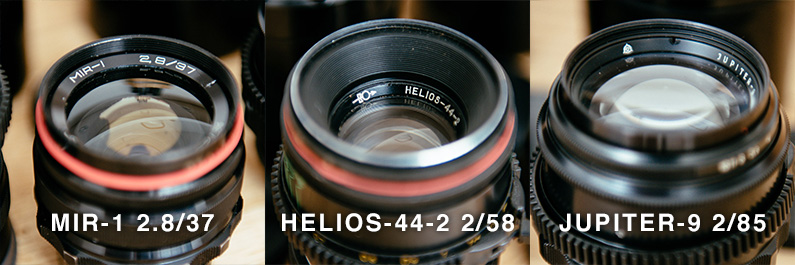
We used 3 lenses during production.
MIR-1 37mm f/2.8
HELIOS-44-2 58mm f/2
JUPITER-9 85mm f/2
These lenses were used on the Sony NEX-FS100 Super35mm camera with a simple M42 to NEX adaptor. We recorded to an Atomos Ninja 2 in ProRes 422 HQ.
The original plan was to use a technique call "Lens Whacking"* so we could generate additional flares and light leaks. What was I thinking??? We were shooting in the middle of a forest in March. Temperatures in the Northern Hemisphere had yet to start warming up and even the mud was still frozen. Hand holding a metal lens body in those conditions was almost impossible. So rather then drop the lenses in the freezing mud we worked with the smoke and light coming in through the trees to achieve a lot of the look were were after.
Once the edit was complete the project was then graded using the Film Convert plugin in Final Cut Pro X.
View the final film here: "The Furnace of Resurrection"
* a technique where you shoot with the lens disconnected from the camera
Blackmagic Cinema Camera – Lowlight Test
A quick and dirty sensor stress test.
There had been a great deal of discussions on the Blackmagic forums about how the Blackmagic Cinema Camera performs when under exposed in lowlight conditions (http://forum.blackmagicdesign.com/viewtopic.php?f=2&t=4269). This test was based on those discussions.
We used the Sony NEX-FS100, recording to ProRes HQ via an Atomos Ninja 2, as known refrences for comparison. All shots were underexposed by over 2 stops.
No noise reduction was done in post and there is a rolling noise pattern in the BMCC footage but at over 2 stops under exposed I'd expect to see sensor take strain.
Light meter reading
ISO1600
180º Shutter (1/50th)
Aperture f/0.9
Camera Set-up
ISO1600, 25p, 180º Shutter (1/50th)
Sony NEX-FS100
Lens: Carl Zeiss ZF.2 Planar T* 1,4/50 @ f/5.6
Picture Profile: G-Log Ultimate 1.0
Recorded in ProRes HQ via an Atomos Ninja 2
Blackmagic Cinema Camera
Lens: Carl Zeiss ZF.2 Distagon T* 2/35 @ f/5.6
Shot in ProRes HQ - Film and 2.5K RAW
Sample DNGs can be downloaded here: dl.dropbox.com/u/6460491/Lowlight_DNG.zip
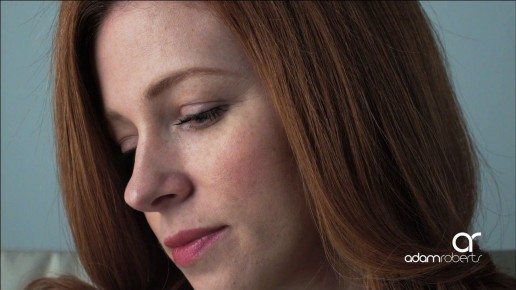
Blackmagic Cinema Camera - Hair and Skintone Test
A simple Hair and Skintone test.
We wanted to test the new Blackmagic Cinema Camera to see how it performed with skintones and hair. We used the Sony NEX-FS100 and Canon 5D MK2 as known refrences for comparison.
This test was done so we could find out how the BMCC could fit into out work flow. It was not a scientific lab test nor was it a test to see which camera was better.
The BMCC likes to be exposed to the right and the footage here is probably 1-2 stops under exposed.
Sample DNGs can be downloaded here:
dl.dropbox.com/u/6460491/BMCC_skintone_test.zip
Notes on workflow:
Canon 5D Mark II
Lens: Canon EF 100mm F2.8 L IS USM Macro @ f/5.6
Picture Profile: Technicolor's CineStyle Profile
Sony NEX-FS100
Lens: Carl Zeiss ZF.2 Planar T* 1,4/50 @ f/5.6
Picture Profile: G-Log Ultimate 1.0
Blackmagic Cinema Camera
Lens: Carl Zeiss ZF.2 Distagon T* 2/35 @ f/5.6
Shot in 2.5K RAW
Both the Sony NEX-FS100 and the Canon 5DMK2 footage was transcoded to ProRes HQ with 5DtoRGB. I then colour corrected the footage in Final Cut Pro X.
The Blackmagic footage was exported from Resolve in 3 ways as I wanted to test different work flows.
• 1st option I applied a Rec709 LUT to the RAW files and exported ProRes HQ 1080p.
• 2nd option I applied the BMC Film LUT to the RAW files and exported ProRes HQ 1080p.
Both methods involved not colour correction in Resolve. All that was do was a LUT was applied to the RAW files. I then colour corrected the footage in Final Cut Pro X.
• In the 3rd option I graded the footage in Resolve with a single node and exported ProRes HQ 1080p
All footage was then edited in ProRes HQ in Final Cut Pro X.