
A Workflow for AVCHD in FCPX and Resolve

With Blackmagic Design DaVinci Resolve 9 Lite being free and a really powerful grading tool, many users are trying it out. It makes a great companion to Apple Final Cut Pro X and is really easy to move files between both applications via XML.
Some however, are finding it performs really badly with AVCHD files.
When you import AVCHD files, like those from the Sony NEX-FS100 / 700, FCPX creates ProRes Proxy files in the background. FCPX then uses those files in the timeline, so you are not actually editing with the AVCHD file but rather the proxy.
When you export you project to Resolve, the XML is linked to the original AVCHD files (that are now in a Quicktime wrapper). While Resolve can read these files it is painfully slow. Too slow to be of any real use.
You can get a smooth working process in Resolve from FCPX with AVCHD though.
Here is a simple workflow:
In FCPX select your Event containing your clips. Select "File/Transcode Media..." and then select "Create optimised media". Let FCPX do it's thing. FCPX is now transcoding the AVCHD files to ProRes 422.
Now export you project XML file.
Now launch Resolve. In the Media panel browse to your Final Cut Events folder. Find the Event folder for your project, inside it you'll see a folder called "Transcoded Media" in there you'll find 3 folders, open "High Quality Media". Select all the files, right click and select "Add to Media Pool".
Now move to the Conform tab and import the FCPX XML file and uncheck "Automatically import source clips into media pool".
Resolve will use the files already in the Media Pool, which are high quality ProRes 422 files, rather than the original AVCHD files. Things should run a lot smoother.
Happy grading.
Blackmagic Cinema Camera – Lowlight Test
A quick and dirty sensor stress test.
There had been a great deal of discussions on the Blackmagic forums about how the Blackmagic Cinema Camera performs when under exposed in lowlight conditions (http://forum.blackmagicdesign.com/viewtopic.php?f=2&t=4269). This test was based on those discussions.
We used the Sony NEX-FS100, recording to ProRes HQ via an Atomos Ninja 2, as known refrences for comparison. All shots were underexposed by over 2 stops.
No noise reduction was done in post and there is a rolling noise pattern in the BMCC footage but at over 2 stops under exposed I'd expect to see sensor take strain.
Light meter reading
ISO1600
180º Shutter (1/50th)
Aperture f/0.9
Camera Set-up
ISO1600, 25p, 180º Shutter (1/50th)
Sony NEX-FS100
Lens: Carl Zeiss ZF.2 Planar T* 1,4/50 @ f/5.6
Picture Profile: G-Log Ultimate 1.0
Recorded in ProRes HQ via an Atomos Ninja 2
Blackmagic Cinema Camera
Lens: Carl Zeiss ZF.2 Distagon T* 2/35 @ f/5.6
Shot in ProRes HQ - Film and 2.5K RAW
Sample DNGs can be downloaded here: dl.dropbox.com/u/6460491/Lowlight_DNG.zip
Blackmagic Cinema Camera - Hair and Skintone Test
A simple Hair and Skintone test.
We wanted to test the new Blackmagic Cinema Camera to see how it performed with skintones and hair. We used the Sony NEX-FS100 and Canon 5D MK2 as known refrences for comparison.
This test was done so we could find out how the BMCC could fit into out work flow. It was not a scientific lab test nor was it a test to see which camera was better.
The BMCC likes to be exposed to the right and the footage here is probably 1-2 stops under exposed.
Sample DNGs can be downloaded here:
dl.dropbox.com/u/6460491/BMCC_skintone_test.zip
Notes on workflow:
Canon 5D Mark II
Lens: Canon EF 100mm F2.8 L IS USM Macro @ f/5.6
Picture Profile: Technicolor's CineStyle Profile
Sony NEX-FS100
Lens: Carl Zeiss ZF.2 Planar T* 1,4/50 @ f/5.6
Picture Profile: G-Log Ultimate 1.0
Blackmagic Cinema Camera
Lens: Carl Zeiss ZF.2 Distagon T* 2/35 @ f/5.6
Shot in 2.5K RAW
Both the Sony NEX-FS100 and the Canon 5DMK2 footage was transcoded to ProRes HQ with 5DtoRGB. I then colour corrected the footage in Final Cut Pro X.
The Blackmagic footage was exported from Resolve in 3 ways as I wanted to test different work flows.
• 1st option I applied a Rec709 LUT to the RAW files and exported ProRes HQ 1080p.
• 2nd option I applied the BMC Film LUT to the RAW files and exported ProRes HQ 1080p.
Both methods involved not colour correction in Resolve. All that was do was a LUT was applied to the RAW files. I then colour corrected the footage in Final Cut Pro X.
• In the 3rd option I graded the footage in Resolve with a single node and exported ProRes HQ 1080p
All footage was then edited in ProRes HQ in Final Cut Pro X.
Quick Sony Alpha NEX-5 hands-on review
Sony recently gave me a Sony Alpha NEX-5 to shoot a short film that is currently in preproduction. I had approached them in the hope that they might loan me one of the new Alpha A55’s but they were keen to see what I could do with the NEX-5.
A week later an NEX-5 kit (with 18-55mm lens) arrived on my desk along with a 16mm f/2.8.
There are currently only 3 E-series lenses available for the NEX-5. The other lens is the 18-200mm. You also have the option of buying the Alpha A mount adapter that lets you connect various Sony Alpha lens. There is another 3rd party option from Lensbaby but I’ll cover that in another review.
Over the last month I’ve been getting my head around what it can and can’t do. Overall I’ve been pretty impressed. I’m not a fan of the ergonomics but then I’m used to shooting with my Nikon D700 which is much bigger and much heavier so the NEX-5 feels to small in my hand.
Shortly after it arrived I upgraded the firmware which included the ability to customize the soft buttons on the rear making it much easier to use in full manual mode as you can now access various settings much faster.
Image quality is great as you would expect from a DX size sensor. The sweep pano mode is also really nice tho it does have it’s limitations.
I’ve found the auto focus struggles in low light.
As a stills camera it can stand it’s ground against the entry and mid range DSLR’s but the real reason I had been given it was to shoot video... so time to do some tests.
It shoots in AVHD mode (H.264) at full HD (1920x1080) at 25 FPS. (The US version shoots at 60i) and the image quality is surprisingly good. The biggest downfall is that, while in Stills mode you have full manual control over the exposure, in Video mode it switches to Auto Gain and will often over or under expose a shot. This is most noticeable if you have a high contrast scene and your brightest area is on the edges of the frame.
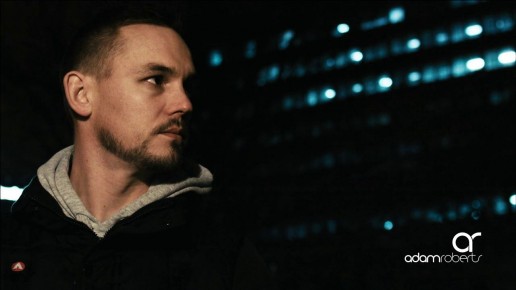
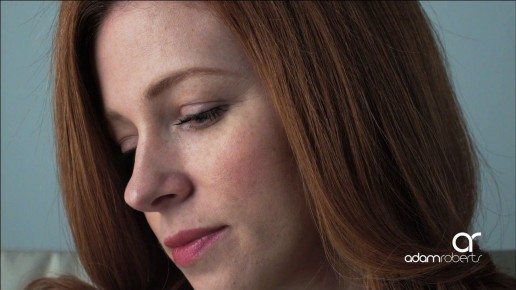
As an example we used the camera to shoot some video for the Sony Photo Challenge which we shot in a black sound studio (See Vimeo clip below). We were going for a film noir look and wanted high contrast images. In one scene the presenter enters frame by stepping out of the darkness into the light. We set-up the focus and exposure for the when the presenter was in the light but as soon as he stepped out of the light the camera increased the gain (and noise) to try and expose the dark area. Not what we wanted. In the end we had to resort to fixing it in post. This should be easy to fix in a firmware update. Lets see if Sony is listening to it’s users.
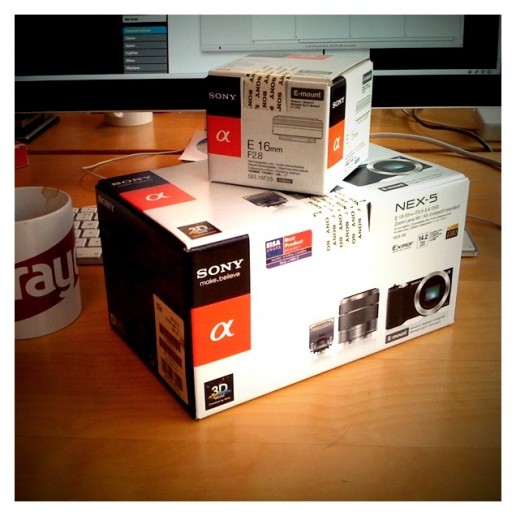
Look what landed on my desk today - Sony NEX-5
So I got back from lunch today to find this waiting for me on my desk:
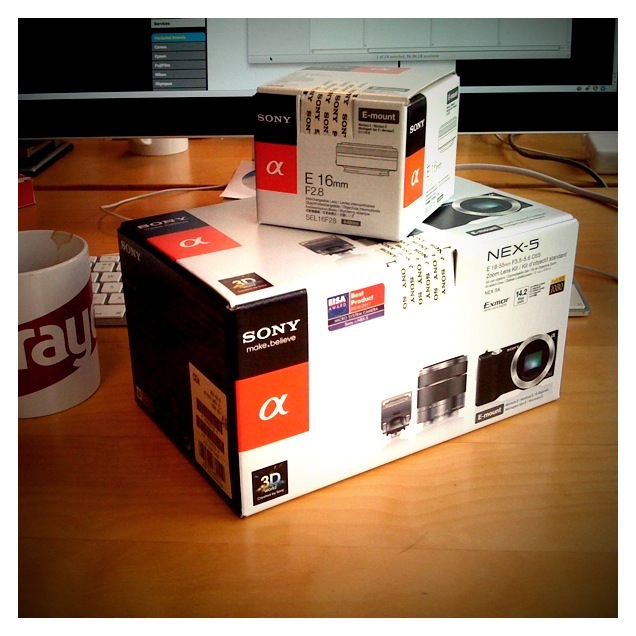
The new Sony Alpha NEX-5 with 18-55mm f/3.5-5.6 and 16mm f/2.8. A little delivery from Sony that will be used to shoot a short film I'm working on. More details in the coming weeks.