DaVinci Resolve on a Hackintosh – Part 3
The Benchmarks
In Part 1 I explained my thinking behind building a Hackintosh and listed the parts. Part 2 covered the build. Now lets look at how this machine performs compared to other known systems.
First lets compare some Geekbench scores. It's a good comparison as Geekbench tests the system but it's not really a great test for real world operations like running DaVinci Resolve. It also does not take into account what GPU you have installed.
You can find scores for standard Mac systems here: browser.primatelabs.com/mac-benchmarks
Lets look at the 2 systems I now have.
MacBook Pro (Late 2011 17" model)
Intel Core i7 2.5GHz
8GB 1333 MHz DDR3 RAM
AMD Radeon HD 6770M 1GB Graphics Card
SSD System Drive
This machine manages a Geekbench Score of 10457 (32bit mode) - That is pretty close to the standard system listed.
Hackintosh
Intel Core i7 3.5GHz
Asus P8Z77-V Premium Motherboard
16GB RAM
2 x EVGA Geforce GTX 670 4GB FTW
SSD System Drive
Stock set-up running at 3.5GHz with RAM running a 1333MHz it manages a Geekbench score of 13153 (64bit mode)
That's about the same as the current 27" iMac.
Over-clocked at a stable 4.2GHz with RAM running at 1600MHz it manages a Geekbench score of 15687 (64bit mode)
That's closer to a Mac Pro (Mid 2010) with 6 core Intel Xeon processor
I'm happy with that.
Now lets look at some real world tests by running the Standard Candle Test in Resolve 9.1.4.
MacBook Pro
No corrections = 24 FPS
4 blur nodes = 7 FPS
8 blur nodes = 4 FPS
16 blur nodes = 2 FPS
32 blur nodes = 1 FPS
64 blur nodes = 0.5 FPS
NR is not supported on ATI cards
Hackintosh
No corrections = 24 FPS
4 blur nodes = 24 FPS
8 blur nodes = 24 FPS
16 blur nodes = 24 FPS
32 blur nodes = 14 FPS
64 blur nodes = 7 FPS
1 NR node = 20 FPS
3 NR nodes = 7 FPS
6 NR nodes = 4 FPS
With this set-up I'm running DaVinci Resolve and colour grading RAW CinemaDNG footage from the Blackmagic Cinema Camera. Resolve is able to playback in realtime with 6 or 7 nodes, including noise reduction without a hitch.
Is this a system I'd install in a high end post production facility? No, not at all. For mission critical commercial work you would want a dedicated high end Mac Pro with a Cubix Expansion Chassis for your GPUs or you would be running a Linux based system. These systems come at a huge cost tho. Not a problem if you clients can afford to fund them.
In my case this system is used for my own personal projects and for work where clients can't afford having their post production done in a high end facility. It's stable and it earns it's keep. It's better than and iMac and while we wait for the New Mac Pros to start shipping I'm able to comfortably work with RAW CinemaDNG footage at 2.5k. Can't ask more than that for the £2350 price tag.
That price could easily be lowered if you already own a display and you don't need Thunderbolt.
By using a motherboard without Thunderbolt and only installing a single GTX670 2GB card (using a cheaper graphics card like the GT640 for the GUI) you would bring the cost down to the £1k mark. View my amazon store for the parts list on a budget build.
If you are interested in building your own Hackintosh I've listed all the parts I used on my Amazon UK Store and my Amazon US Store.
For help with your build and advice on other components check out the forums on www.tonymacx86.com
DaVinci Resolve on a Hackintosh - Part 2
The Build
In Part 1 I explained my thinking behind building a Hackintosh and listed the parts. So lets get into the build.
When I was growing up many of my friends at school had built their own PCs. It was never something that interested me. In the early 90's I started work as an art director at TBWA and the Macintosh was our system of choice and has been mine ever since. So I had never built my own PC. When the parts arrived I was a little nervous but thought "how hard can this be?". Assembly was pretty straight forward and I had the system built in an afternoon. If you can use a screw driver and can read then you should no issues at all assembling the parts.
Next step was getting the OS up and running. I had spent a lot of time on the tonymacx86.com forum reading other users posts, researching my components and planning the build. The forum, like most forums, is filled with people having issues. Many of those come from simply not following instructions. There are also a lot of very knowledgeable people on the forum and in most cases you can find a solution to your problem without even asking a question. tonymac86 and the rest of the team have developed the process over the years that it's now pretty straightforward. Worth donating to their site if it's useful to you. If you use parts that have been tried and tested and follow the instructions you should have a machine up and running in a few hours.
So I began the process... My main guide was this: UniBeast: Install OS X Mountain Lion on Any Supported Intel-based PC
With OS X 10.8.3 most components on my list work out of the box.
What you need:
1. A purchased copy of OS X Mountain Lion (get it from the Mac App Store)
2. A USB Flash Drive to install UniBeast and the OS X instlled onto
3. MultiBeast to install the bootloader and drivers
My first task was to flash the motherboard with an updated bios. You don't need to do this on Gigabyte motherboards. The ASUS motherboard I chose needs this as the machine will kernel panic when booting as the OS tries to set-up power management. It's a quick and simple process. You can download the updated BIOS here: biosrepo.wordpress.com/asus/z77 and the process to flash the BIOS is explained here: event.asus.com/2012/mb/usb_bios_flashback_guide.
So now the machine is ready for installation. Our next step is to create a bootable USB flash drive. Over to my MacBook Pro, where I had purchased OS X Mountain Lion, and run the latest version of UniBeast. Follow the steps in Step 2 of the UniBeast Guide and create a bootable USB flash drive with latest version of OS X (10.8.3 at the time).
Back over to the Hackintosh. For the set-up you need to use the onboard graphics card ports. I connected my Asus PB278Q 27"display to the display port on the motherboard. It might be best to remove the GeForce GPUs for the set-up tho I have managed to reinstall the OS with them connected.
You now need to make sure the BIOS is set up correctly. This is pretty simple. Powered up the machine holding F2. This will bring you to the BIOS set-up. Now hit F5 to set the BIOS to it's defaults. You need to make a few changes from the default settings so now you need to hit F8 to go to the advanced menus. These are the changes you'll need to make:
Advanced -> SATA Configuration -> SATA Mode Select -> AHCI
Advanced -> SATA Configuration -> Set any SATA ports that need to be hotswapable
Advanced -> System Agent Configuration -> Graphics Configuration -> Primary Display: iGPU (you need to switch this to PCI-E after installation)
Advanced -> System Agent Configuration -> Graphics Configuration -> iGPU Memory -> 64MB
Advanced -> USB Configuration -> Intel xHCI -> Auto
Advanced -> USB Configuration -> EHCI Hand-off -> Enabled
Advanced -> Onboard Devices Configuration -> HD Audio Controller -> Enabled
Advanced -> Onboard Devices Configuration - Front Panel Type -> HD
Advanced -> Onboard Devices Configuration - SPDIF Out Type -> HDMI
Reboot and follow steps in Step 3 of the UniBeast Guide.
So now you should have your OS installed. We are almost there. For the Hackintosh to work we need to install some bootloaders and extensions. These allow OS X to run the Hackintosh hardware. Things like audio and networking. The latest version of MultiBeast has all of this covered.
Follow the steps in Step 4 of the UniBeast Guide.
These are the items that need to be checked in the MultiBeast installer:
UserDSDT or DST-Free Installation
Drivers & Bootloaders -> Drivers -> Audio -> Realtek AKC8xx -> Without DSDT -> ALC898
Drivers & Bootloaders -> Drivers -> Disk -> 3rd Party SATA
Drivers & Bootloaders -> Drivers -> Disk -> 3rd Party eSATA
Drivers & Bootloaders -> Drivers -> Disk -> TRIM Enabler -> 10.8.3 TRIM Patch
Drivers & Bootloaders -> Drivers -> Miscellaneous -> FakeSMC
v5.1.61
Drivers & Bootloaders -> Drivers -> Miscellaneous -> FakeSMC
v5.1.61 Plugins
Drivers & Bootloaders -> Drivers -> Miscellaneous -> USB 3.0 - Universal
Drivers & Bootloaders -> Drivers -> Network -> Intel - hnak’s AppleIntelE1000e
Drivers & Bootloaders -> Bootloaders -> Chimera v2.0.1 r2109
Customization -> Boot Options -> Generate CPU States
Customization -> Boot Options -> GraphicsEnabler=No
Customization -> System Definitions -> Mac Pro -> Mac Pro 3.1
Probably a good idea to run Disk Utility and repair permissions at this point. Then shut down the machine and install and reconnect you display to the GeForce GTX card. Remember to set your primary display to PCI-E in the BIOS:
Advanced -> System Agent Configuration -> Graphics Configuration -> Primary Display: PCI-E
Now boot up. You should be running fine. Even USB3 should working... but there is an issue. I found that any time I connected a LaCie Rugged USB3 drive to a USB3 port it would hang the machine. It was fine connected to USB2 but what good it that, right? All my other USB3 drives were fine. There is a fix tho. You just need to replace the USB3 extension that Multibeast installs with this one and repair permissions once you are done.
In Part 3 I've posted some benchmarks and my closing thoughts...
DaVinci Resolve on a Hackintosh - Part 1
The Parts
I currently run DaVinci Resolve (and FCPX) on a CustoMac/Hackintosh. While Grant Perry from Blackmagic has stated that the new Mac Pro is an awesome machine to run DaVinci Resolve 10 on, it is still a little way off. This article explains why I built a Hackintosh and outlines my set-up for those that might want to do the same.
I am first and formost a Director and DoP. The post production process however has always interested me and over the years I’ve taught myself the process of editing and grading. Some projects I work on have budgets that allow the edited and grading to be outsourced to post production facilities but on personal projects and smaller low budget jobs I’m happily to shoot, edit and grade. Many of these projects have been finished on a full spec late 17″ MacBook Pro. Running DaVinci Resolve on such a machine is slow but you can manage if it’s a simple HD project that only needs a simple grade.
So last year I started looking at my options for a more suitable machine to run DaVinci Resolve. The iMac looked ok and a fully specced 27″ machine looked like a good option. I was looking at spending around £2500… Then my Blackmagic Cinema Camera arrived. And my needs changed.
To get the most out of the BMCC (which shoots 2.5K RAW) I would need a lot of power… mostly GPU power. Looking at the iMac spec it was clear that while it would be ok it would be pushed to it’s limit from the start. So I then started looking at the Mac Pro. A machine that on the surface looked to be much more expandable. The more I looked into it the more I found that the hardware was so out of date that it was really silly spending money on a system that was long overdue for an update. I was not the only one. Most of the Mac Pro users have been waiting for a proper update for a few years. Apple had been promising an update was in the wings but there was still no sign of it when I started this process (Today, 10 June 2013, Apple announced the New Mac Pro).
I had a list of things I wanted from a machine but 2 were essential:
Thunderbolt – I have a Promise Pegasus R6 RAID that I use for my projects and have invested in Thunderbolt devices.
GPU power – I wanted to run at least 2 GeForce GTX570/580/670/680 cards with 2GB RAM or more for DaVinci Resolve.
The iMac has Thunderbolt but I was limited to a single GeForce GTX680MX 2GB GPU. The Mac Pro has no way of supporting Thunderbolt and I’d need an external expansion chassis to run the GPUs I wanted. So it seemed I was out of luck and would have to wait for the mythical future Mac Pro.
I then started researching Windows machines. Seemed I could build a serious machine that would be more than powerful enough to run Resolve but would need to move to Windows. Not ideal. I’ve been a Mac user for over 18yrs. All my past and current project files are Mac based. Sure I could convert them to Premier Pro projects and port them over but thats a lot of work. I also rely on working with other editors that are Mac based and Windows also does not fully support ProRes workflows.
This brought me to the Hackintosh. Could this be a temporary solution? I was not keen on the idea of running a hack but I thought to myself “this would be a temporary thing and if it was not stable I could always intall Windows…”
So I set myself a budget of £2000 and began my research on what parts would work. My aim was not to built the most powerful machine but rather to build a stable machine that included Thunderbolt and would run Resolve comfortably. My evenings and weekends were spent looking at component specs and then researching how stable other had found them in a Hackintosh system. I eventually put together a shopping list. The bottom line was just short of £2350. £350 over budget but I have upped the spec on a few items.
Before we jump into the build and the performance of the machine lets look at that shopping list and why I chose each item:
Asus P8Z77-V Premium Motherboard
I wanted Thunderbolt which limited my to very few rather expensive Z77 motherboards. If I did not want Thunderbolt I could have gone for a much cheaper Z77 motherboard or the X79 motherboards which would have given me more performance options. This ASUS motherboard also offer better PCIe configurations than most which meant in theory I would get more benefit from the GPUs.
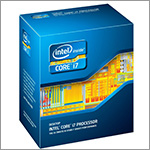
Intel Core i7-3770K CPU
This is the fastest processor available for the Z77 motherboard and matched the highest spec available in the iMac. If I had gone with the X97 motherboard (and no Thunderbolt) I could have run a much more powerful CPU.
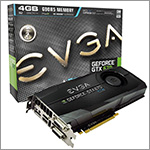
2 x EVGA NVIDIA GTX 670 FTW 4GB DDR5 PCI-E Graphics Card
I wanted enough power to run DaVinci Resolve smoothy. I also wanted enough GPU RAM for 2K and higher resolutions (BMCC shoots in 2.5K RAW). The 670 was a lot cheaper than the 680 with only a small hit on performance.
SanDisk Extreme 240GB SATA SSD
A fast SSD for the system to run on. Did not need a huge system drive as all my footage is stored on my Thunderbolt RAID.
2 x Corsair 16GB 1600MHz DDR3 Vengeance Memory Kit
32GB of RAM, the maximum that can be installed on a Z77 motherboard.
TP-LINK TL-WDN4800 N900 Wireless PCI Express Adapter
The ASUS motherboard includes WIFI and Bluetooth on the motherboard but they are not seen by Mac OSX.
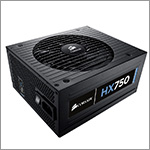
Corsair HX750 Professional PSU
A reliable power supply with enough overhead to drive the 2 GPUs.
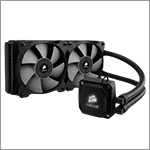
Corsair Hydro Series H100i Liquid Cooler for CPU
Quiet liquid cooling for the CPU. There are much cheaper options out there but this is the one I ended up selecting.
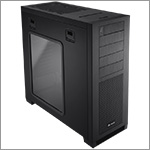
Corsair Obsidian 650D Mid Tower Case
A simple clean case to build the system into. I nice little feature of this case is that it has a SATA slot onto to connect SSD’s or drives. Perfect for dumping footage from the SSDs used in the BMCC or backing up projects to naked SATA drives.
Asus PB278Q 27″ Widescreen
A nice 27″ matte screen for my GUI.
OS X 10.8.3 works well and has been stable. You’ll need to buy a copy from the App Store for your build.
To help with the your own build all the above parts are listed on my Amazon UK Store and this Amazon US Store
SanDisk 16GB USB Flash Drive
A USB flash drive for the installation process.
To help with the your own build all the above parts are listed on my Amazon UK Store and this Amazon US Store
I already own a USB Apple Extended Keyboard and A Wacom Intuos 5 so there was no need for me to buy a keyboard and mouse.
Blackmagic Film to Video plugin by Antler Post
Over the last few weeks I've been beta testing a Final Cut Pro X plugin developed by Nick Shaw over at Antler Post-Production Services.
The plugin is a great workflow tool for Final Cut Pro X (FCPX) users who are working with footage from the Blackmagic Cinema Camera (BMCC) that will be delivered to television.
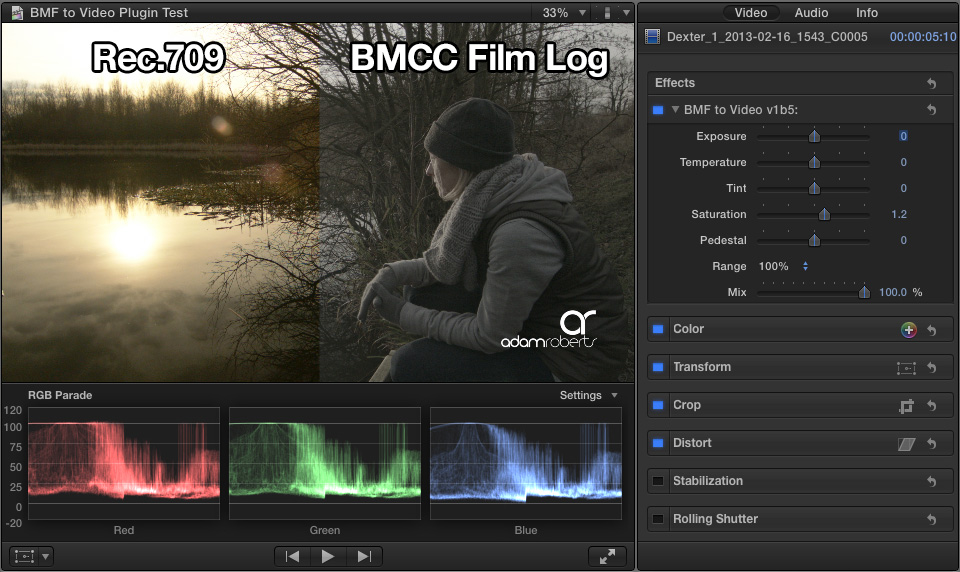
It started out as a simple tool for viewing Apple ProRes Film Log footage from the Blackmagic Cinema Camera as Rec.709. This is very similar to Nick's popular plugin for for viewing ARRI ALEXA LogC footage as Rec.709 in the Final Cut Pro 7.
As it's been developing Nick has added a few really useful features that make this plugin worthwhile owning for anyone working with footage from the BMCC.
In it's simplest application the plugin applies the same Rec.709 LUT that is available in DaVinci Resolve to your ProRes Film Log footage. All without leaving your FCPX timeline.
In addition to this Nick has included a few simple sliders that give you some added control and speed up your workflow. Many of these adjustments can be done with the built in Colour Correction tools in FCPX but it's handy to have all these controls in one place and they are really simple to use.
First off there is an Exposure slider the lets you simply fine tune the overall exposure.
Next up are the Temperature and Tint sliders. These are very useful as the BMCC does not have a way to set the white balance manually. You only have 6 presets to chose from (3200K, 4500K, 5000K, 5600K, 6500K and 7500K). With these 2 sliders you can make the fine adjustments you might needed to get the colour balanced spot on.
Next we have the Saturation slider. Applying a straight Rec.709 LUT on you Log footage can sometimes produce results that are to saturated or in some cases not saturated enough. This is a nice simple way of finding your preferred look.
Next is the Pedestal slider. This is for fine tuning your black point without changing your exposure. If you have adjusted your exposure you may find your black have become to crushed or they have lifted to much. This slider lets you put you black levels back where you want them.
The Range options lets you select 100% (Broadcast Safe as Resolve would do the conversion) or 109% (as the camera shoots Video mode and similar to how many Sony cameras capture their image).
The last slider is the Mix slider. Its simply lets you mix your results with the original Log footage. Many people like the milky look of Log footage and often only want to make slight adjustments. This can be useful for those that are looking for something between Rec.709 and Log.
Watch the whole film above for samples of footage with the plugin applied.
IMPORTANT NOTE:
There is a serious bug in FCP X, which causes random flash frames in renders. Adjusting any parameter, or deleting a render file, will make FCP X re-render, and may remove the flash frame. Or, since it is an intermittent bug, it may just cause it to appear on a different frame. Although this bug was widely discussed after the release of FCP X 10.0.6, Apple did not include a fix in the 10.0.7 update. The only known work around is to render your final file in Compressor 4.
Notes on software versions:
Antler BMF to Video Plugin - v1b5
Blackmagic Cinema Camera firmware - 1.2
Apple Final Cut Pro X - 10.0.7
Apple Compressor - 4.0.6
Lenses and Equipment used:
Tokina 11-16mm f/2.8 AT-X (Nikon mount) with Novoflex adaptor
Canon EF 24-105mm f/4L IS USM
Light Craft Workshop Fader ND MK II
For more info contact Nick Shaw over at Antler Post-Production Services.
Music by Steve Tait - used with permission.
A Workflow for AVCHD in FCPX and Resolve
With Blackmagic Design DaVinci Resolve 9 Lite being free and a really powerful grading tool, many users are trying it out. It makes a great companion to Apple Final Cut Pro X and is really easy to move files between both applications via XML.
Some however, are finding it performs really badly with AVCHD files.
When you import AVCHD files, like those from the Sony NEX-FS100 / 700, FCPX creates ProRes Proxy files in the background. FCPX then uses those files in the timeline, so you are not actually editing with the AVCHD file but rather the proxy.
When you export you project to Resolve, the XML is linked to the original AVCHD files (that are now in a Quicktime wrapper). While Resolve can read these files it is painfully slow. Too slow to be of any real use.
You can get a smooth working process in Resolve from FCPX with AVCHD though.
Here is a simple workflow:
In FCPX select your Event containing your clips. Select "File/Transcode Media..." and then select "Create optimised media". Let FCPX do it's thing. FCPX is now transcoding the AVCHD files to ProRes 422.
Now export you project XML file.
Now launch Resolve. In the Media panel browse to your Final Cut Events folder. Find the Event folder for your project, inside it you'll see a folder called "Transcoded Media" in there you'll find 3 folders, open "High Quality Media". Select all the files, right click and select "Add to Media Pool".
Now move to the Conform tab and import the FCPX XML file and uncheck "Automatically import source clips into media pool".
Resolve will use the files already in the Media Pool, which are high quality ProRes 422 files, rather than the original AVCHD files. Things should run a lot smoother.
Happy grading.
